AWS S3 integration with Spring Boot (AWS S3 + Spring Boot)
- 4.2/5
- 10011
- Jul 20, 2024
Updated for: Spring Boot 3
In this article we will demonstrate - how to "Download & Upload files to/from AWS S3 in a Spring Boot" project.
Create a AWS S3 bucket
Let's first create a AWS S3 bucket, we will use this bucket to upload/download files from a Spring Boot project.
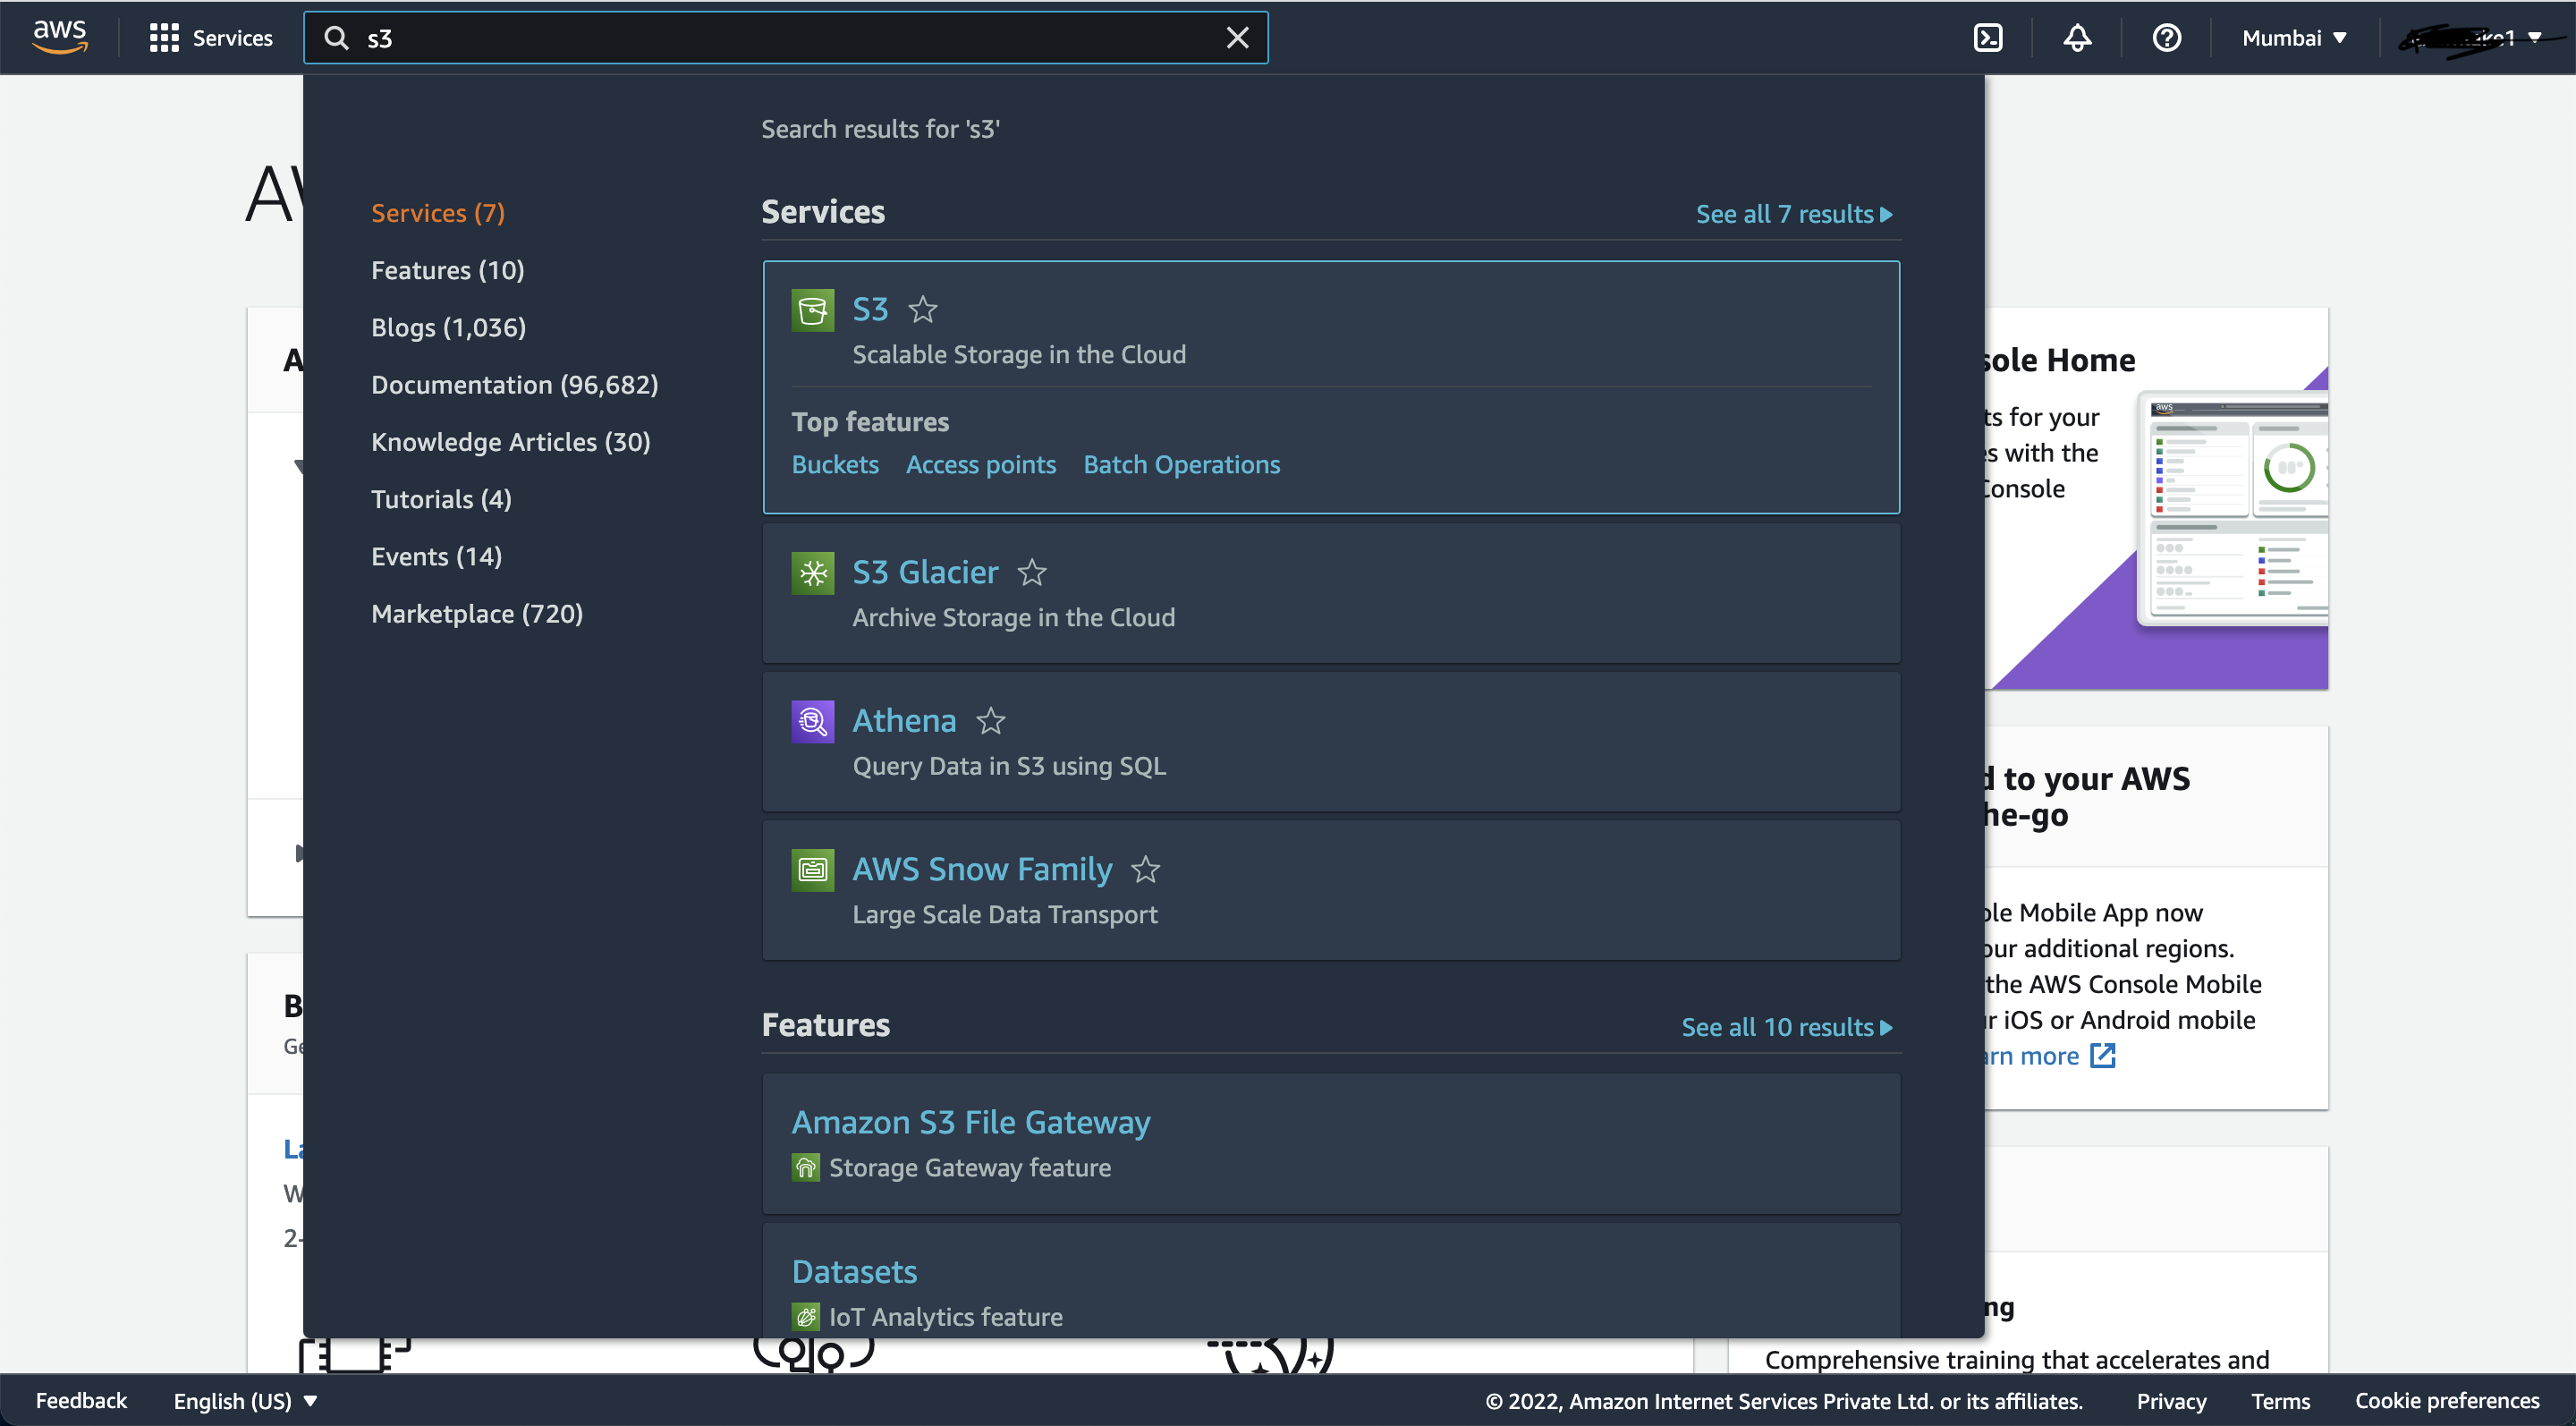
1) Go to AWS Console and search for S3 service as shown in the picture below:

2) Now you should land on "Create Bucket" page as shown in below picture, click on "Create Bucket" button in top-right corner:

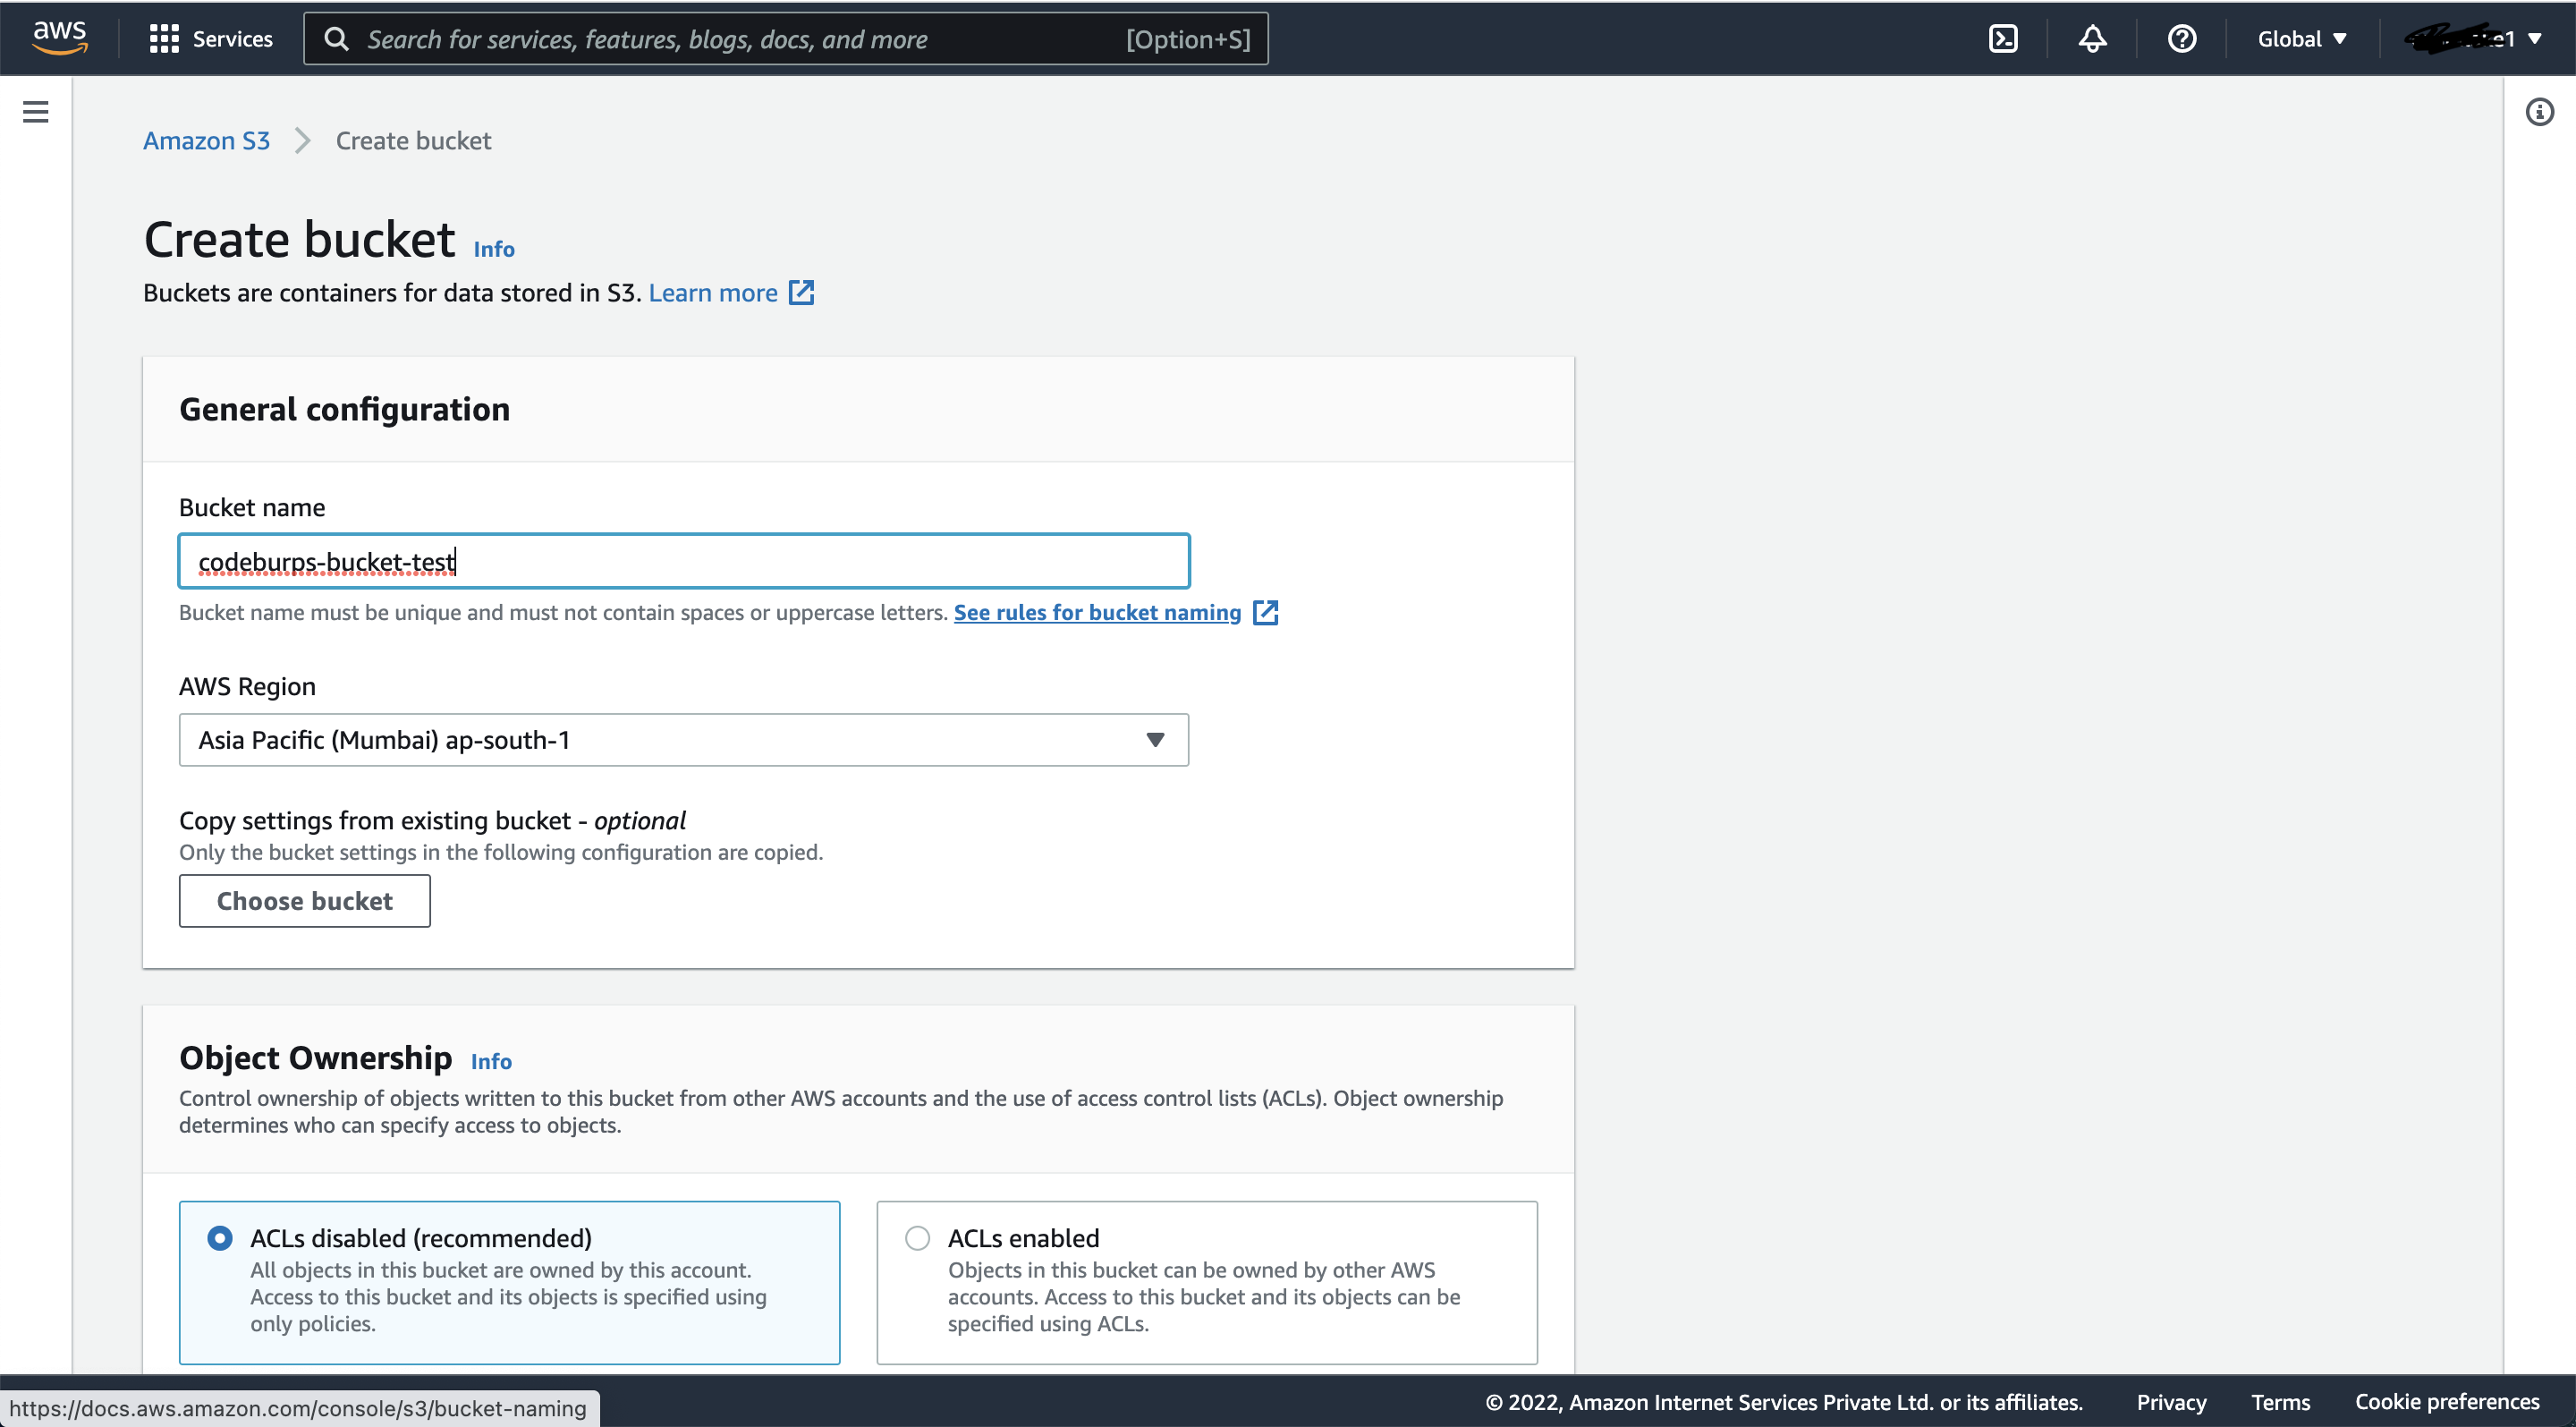
3) Provide appropriate "Bucket Name" and select "AWS Region" from the dropdown, as shown in the picture below:

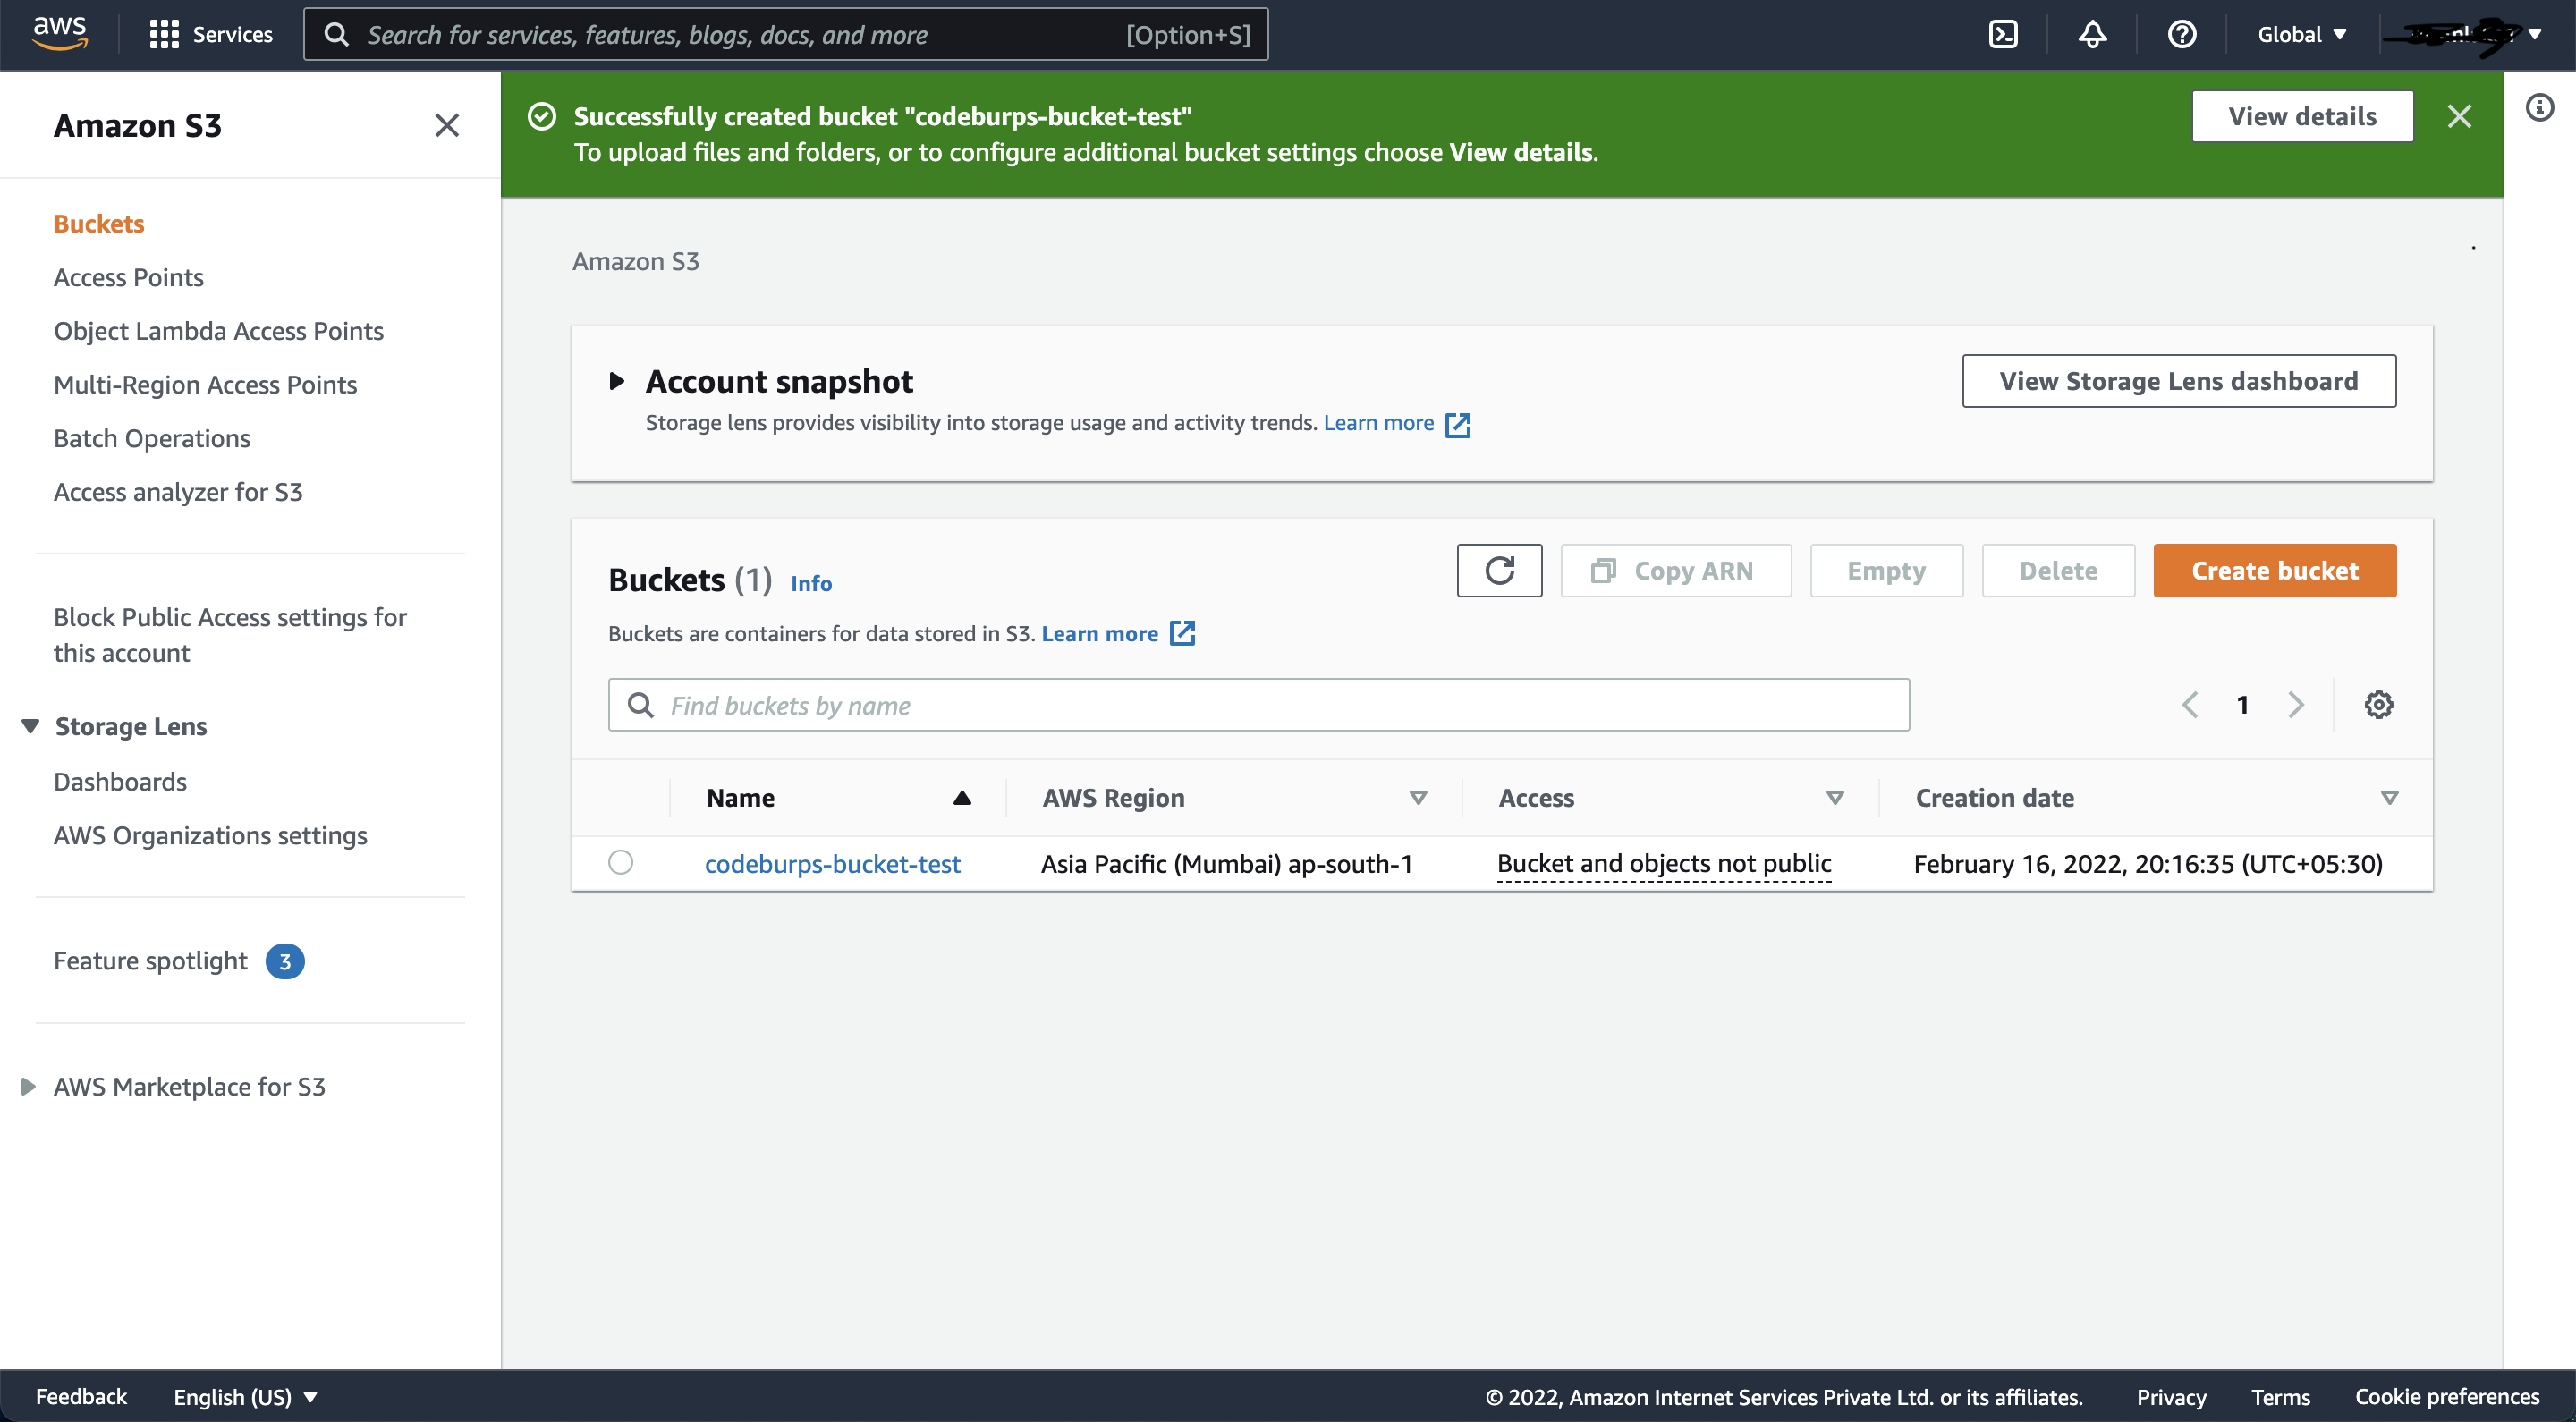
4) That's it, the bucket is now created and we can use it to download/upload files:

5) In order to access this bucket from "Spring Boot" application, we need to generate "security credentials".
Go to "My security credential" page by clicking on top-right dropdown and selecting "Security credentials".
Now generate "Access Key ID" and "Secret Access Key" by clicking on "Create access key" button.
We need these credentials (Access Key ID, Secret Access Key) to access this "AWS S3" bucket from "Spring Boot" application.
Create Spring BOOT Application
Here we are donw with creating a "S3 bucket", let's now create a Spring BOOT Application to "Download & Upload files to/from AWS S3".
1) Dependencies
The final "pom.xml" should look something like this:
2) Configuration
In the configuration below, we are adding aws credentials, MySql configuration, JPA related configurations and logging stuff.
3) AWSCredentials
This is a simple spring boot "@Configuration" file, we are using this to generate a "AWSCredentials" object, we will communicate with S3 Bucket using this object only.
4) Model
This "FileMeta" is used to represent and store file-metadata in mysql, we can use this info to list/download files back from S3.
5) Repository
This is where "Spring Data JPA" comes into picture, we are creating an "FileMetaRepository" implementing "CrudRepository", this will save us from writing any boilerplate code for JDBC stuff.
6) Service
We have defined two interface-backed services, "AmazonS3ServiceImpl" is used to communicate with S3 to get/upload data and "MetadataServiceImpl" is kind of an abstraction in between the application logic and S3 related stuff.
7) Controller
Finally, this is the place where we are defining URLs for this application; here "thymeleaf" is used as a server-side Java template engine for web/UI layer.
8) Thymeleaf UI
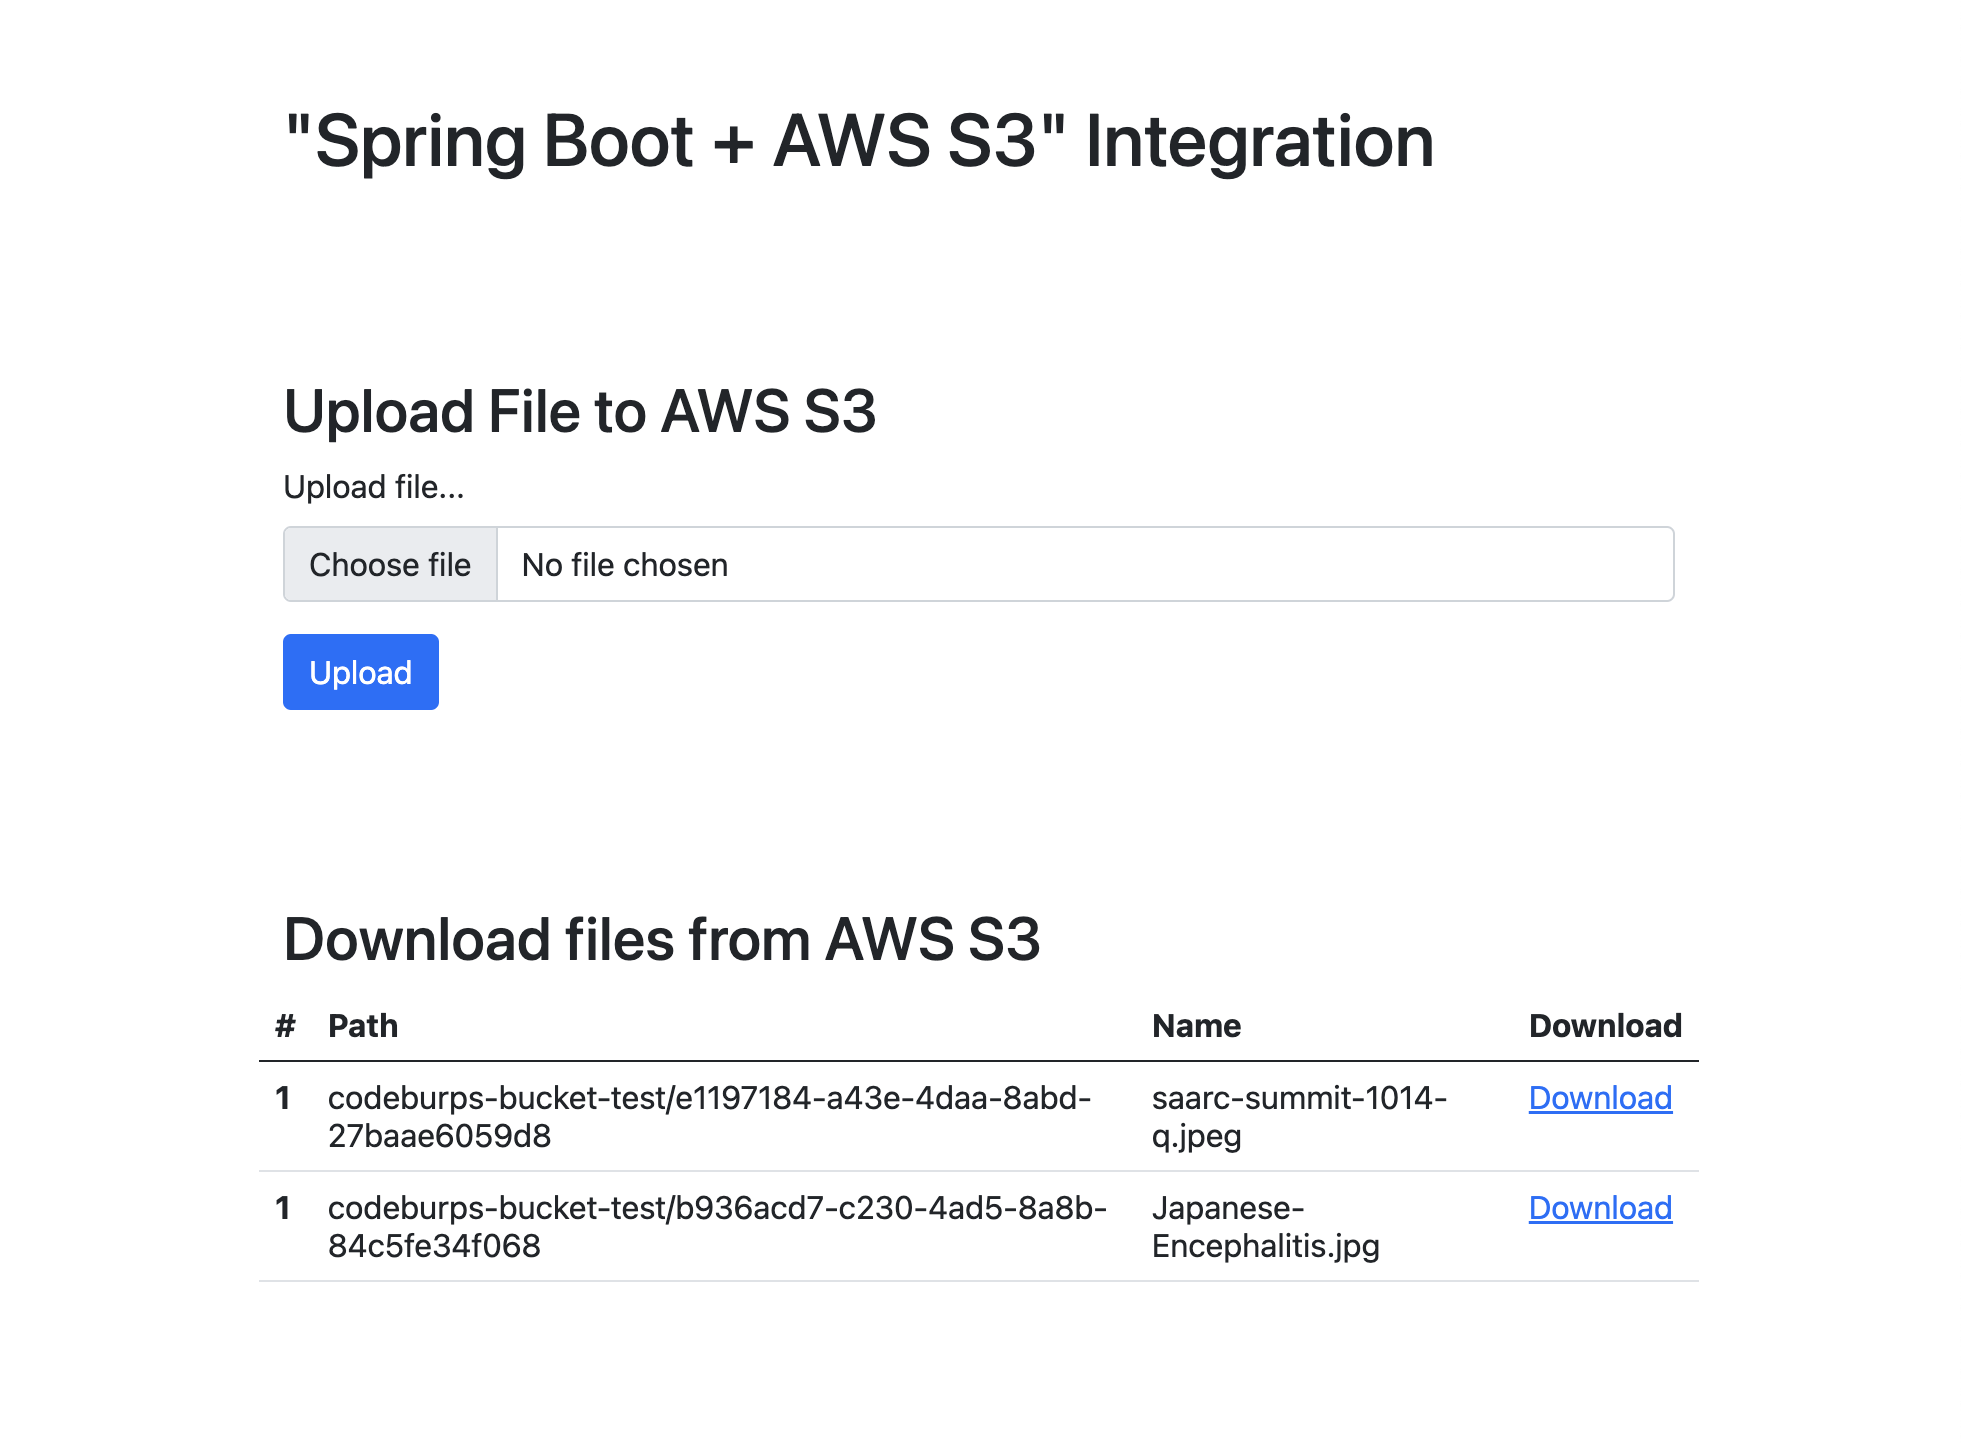
This is a simple UI interface, we have added a form to upload files and a table to list/download already uploaded files.
9) Spring Boot
This is plain old Spring Boot driver class; all the execution starts from here.
10) Testing
Now we are all done with our project setup, run the application and navigate to http://localhost:8080/dashboard to access download/upload files dashboard.

Source code: GitHub