In this article we will see how to Secure a Server-to-Server Communication with Spring Boot & OAuth 2's "client_credentials" grant_type.
In a "client_credentials" grant_type there is no need for a "user" interaction and no browser is involved; it makes it a perfect fit to secure Server-to-Server Communication.
We will first create a "resource-server" containing secured REST endpoints for "Products", next we will create an "authorization-server" using spring-authorization-server, lastly we will create a "client-server" to access "Products" REST APIs with the help of "authorization-server".
Let's get started !!!
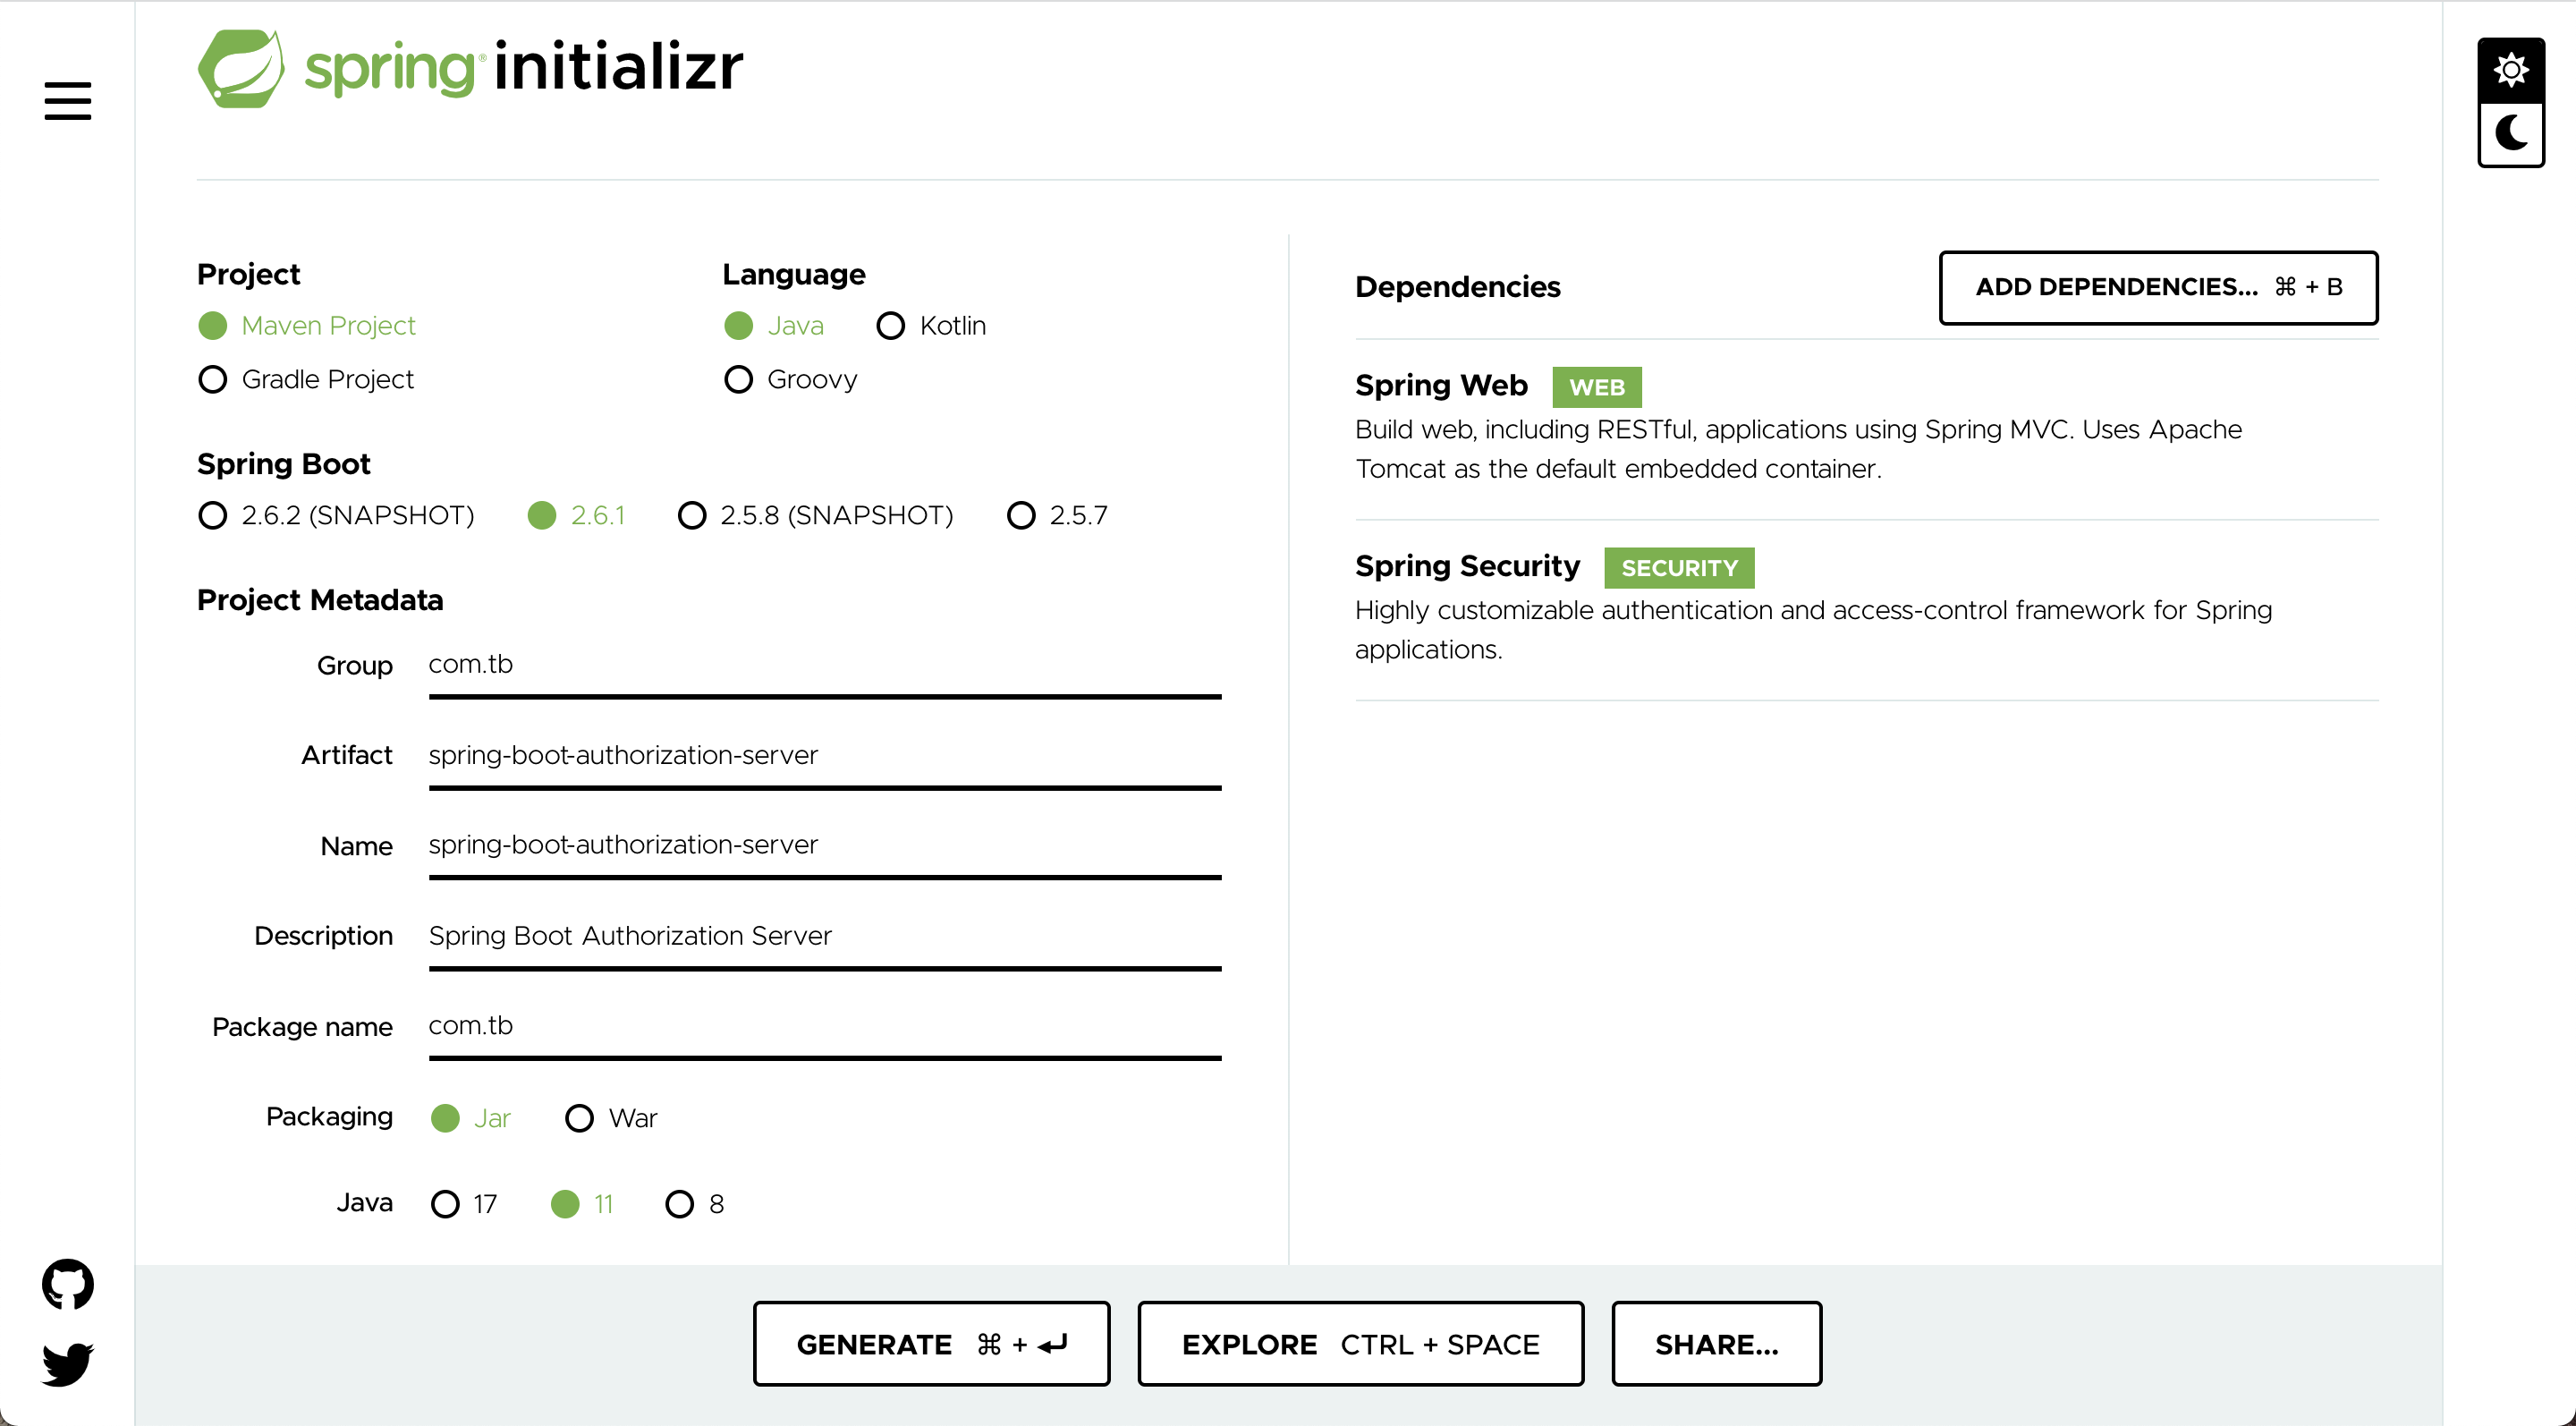
1) Authorization Server
The primary goal of an "Authorization Server" is to issue "OAuth 2.0 tokens" requested by the client and verify those tokens on request of the "Resource Server". It also provides mechanism for "Client" & "User" registration and "Role" & "Authority" management.
1.1) Dependencies
Lets create a project with Spring Initializr, make sure to add required dependencies as shown in the picture below:
 Dependencies
Also add "spring-security-oauth2-authorization-server" dependency to the project; the final "pom.xml" should look something like this:
1.2) Configuration
In the configuration below, we are adding an in-memory client, providing a bean to generate a 2048-byte RSA key and configuring a unique issuer URL as required by an authorization server.
Next, we can also configure "@EnableWebSecurity" to manage the security of this "Authorization Server" server itself, lets keep this blank, for now,
1.3) Host Entry
To make the "ProviderSettings" bean work, we need to add the below entry in the server's hostfile (/etc/hosts).
127.0.0.1 auth-server1.4) Properties file
Let's add "logging" related properties and "server port" to "application.yml".
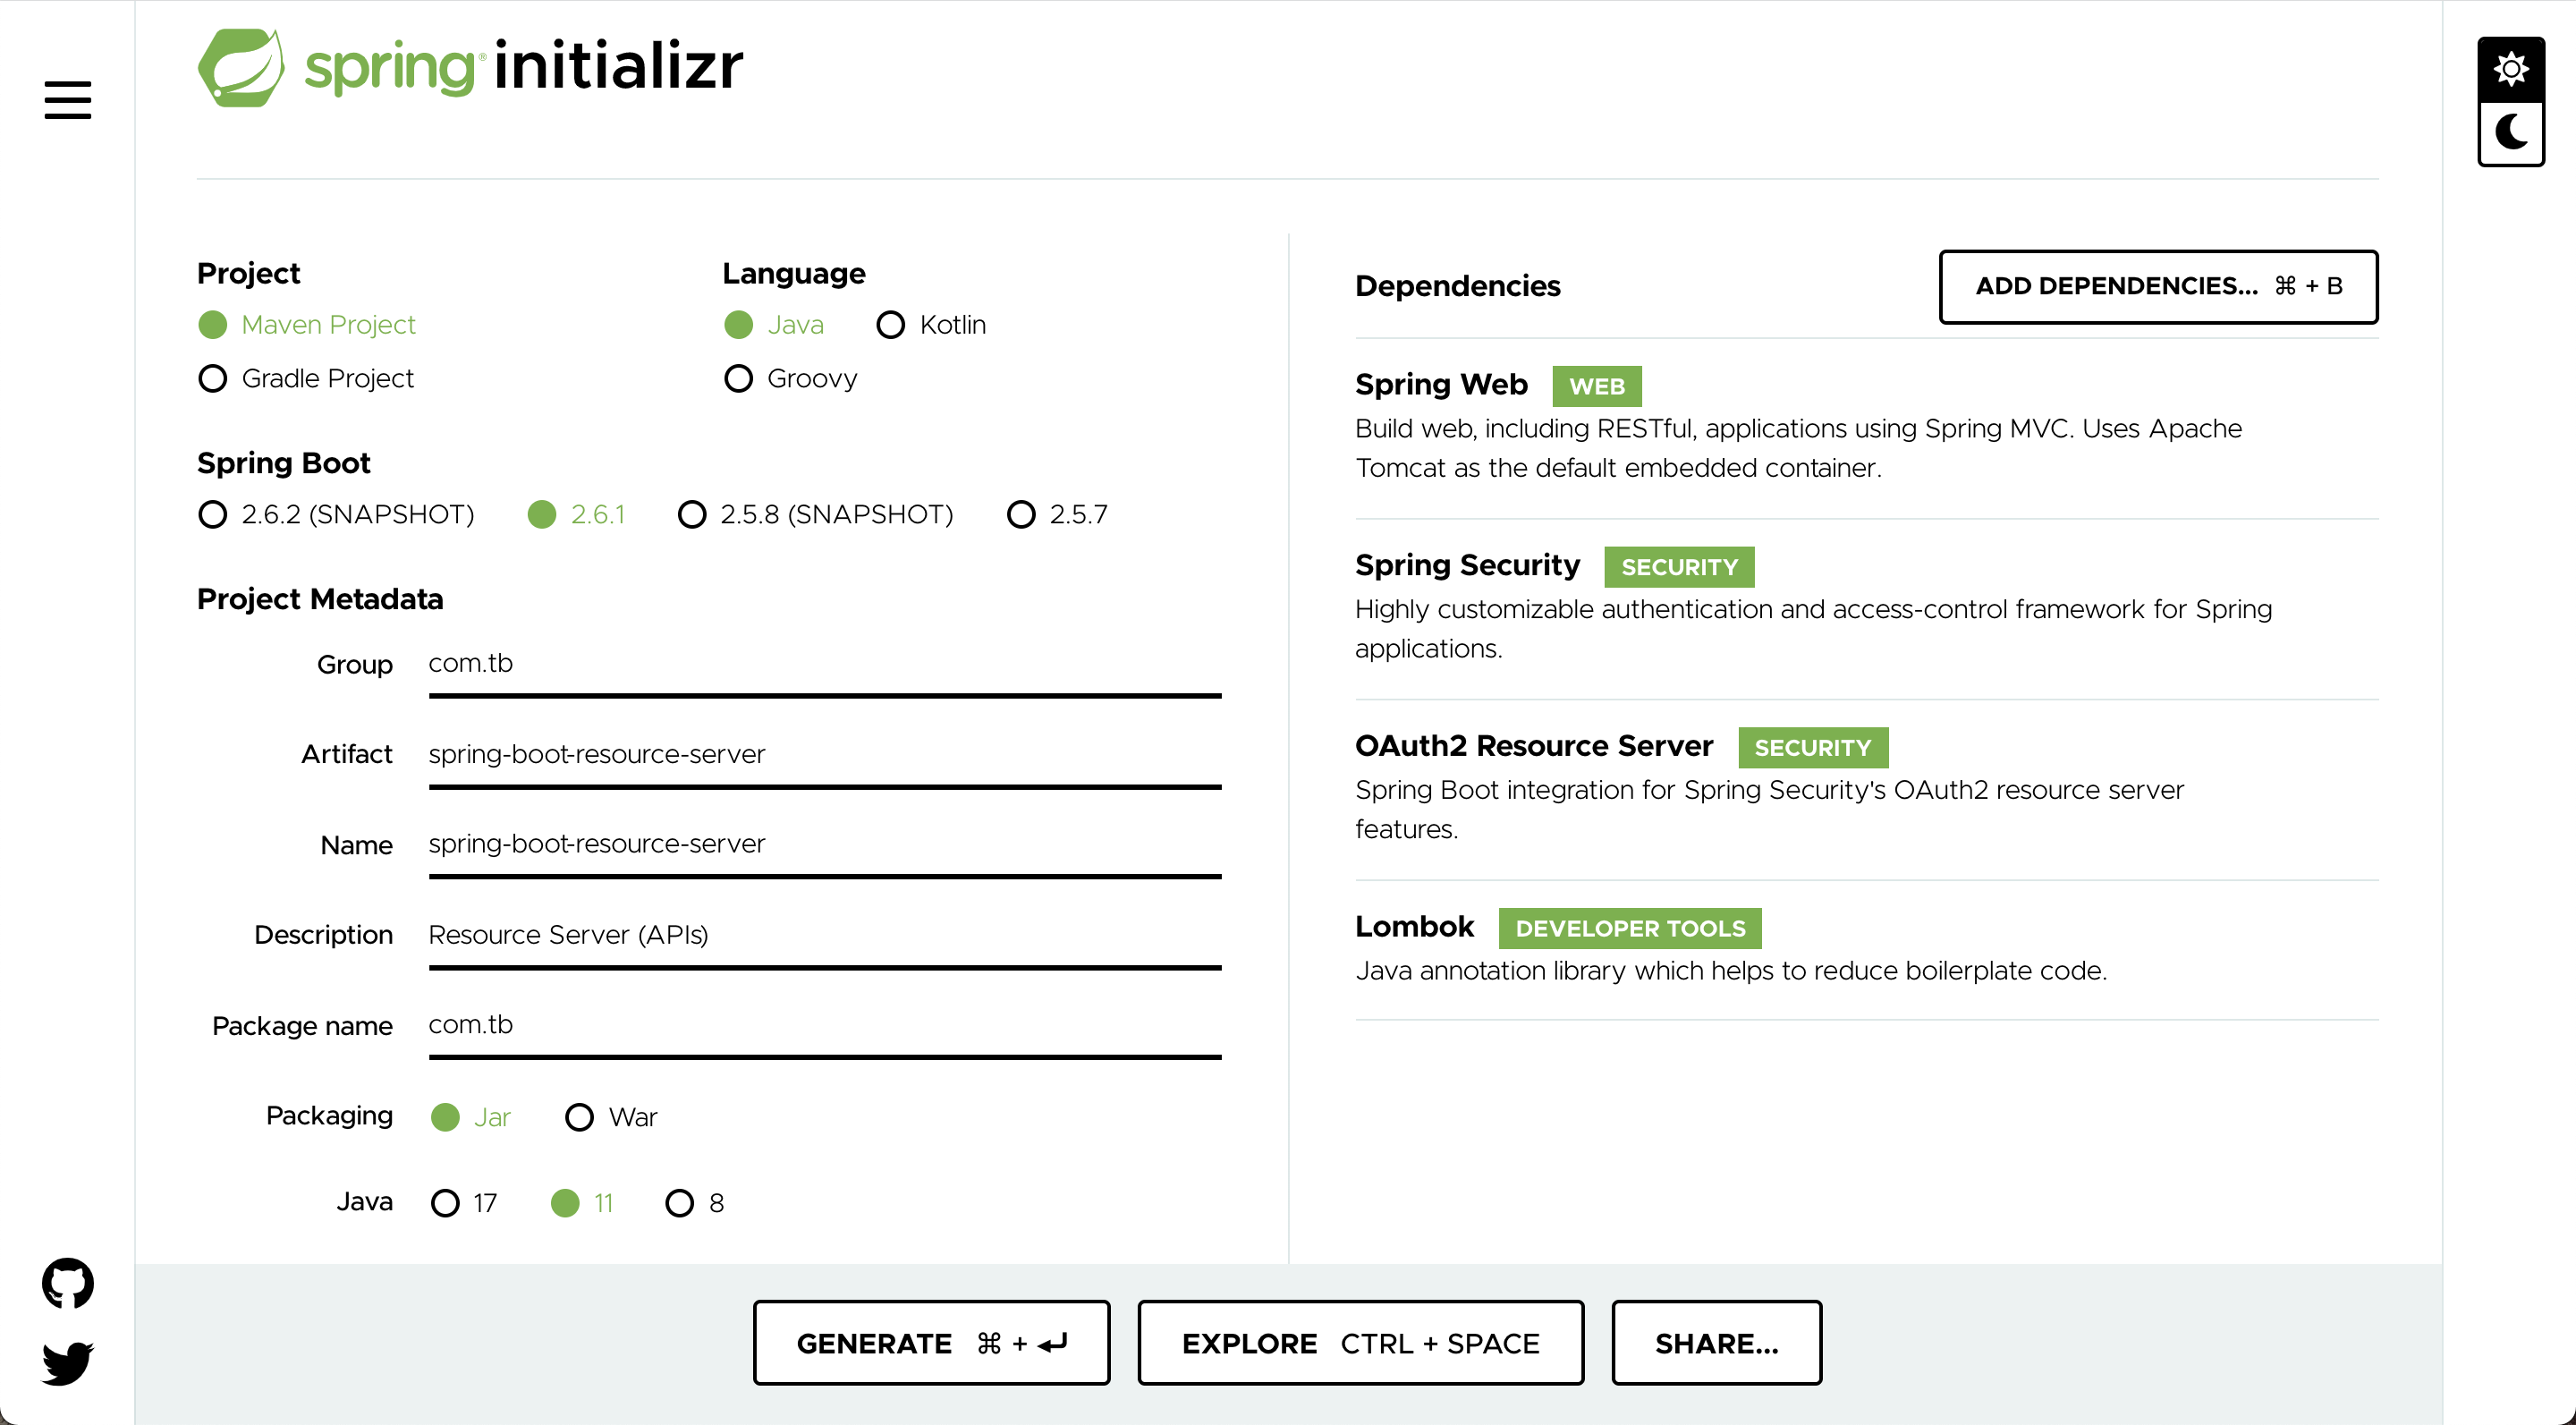
2) Resource Server
A resource server is the one hosting REST APIs; these secured APIs will be accessed by the client with the help of an "OAuth 2.0 token" obtained from the "Authorization Server".
2.1) Dependencies
Lets create a project with Spring Initializr, make sure to add required dependencies as shown in the picture below:
 Dependencies
The final "pom.xml" should look something like this:
2.2) Model
We will create a simple REST endpoint to return a list of "Product", here is the model to represent it:
2.3) Controller
This is the place to define the rest end-point for getting Employee's list:
2.4) Configuration
In the configuration below, we are securing "/products/**" endpoint with "HttpSecurity", this can only be accessed by clients having "products.read" authority.
2.5) Properties file
Let's add "logging" related properties, "server port" and "issuer-uri" to "application.yml".
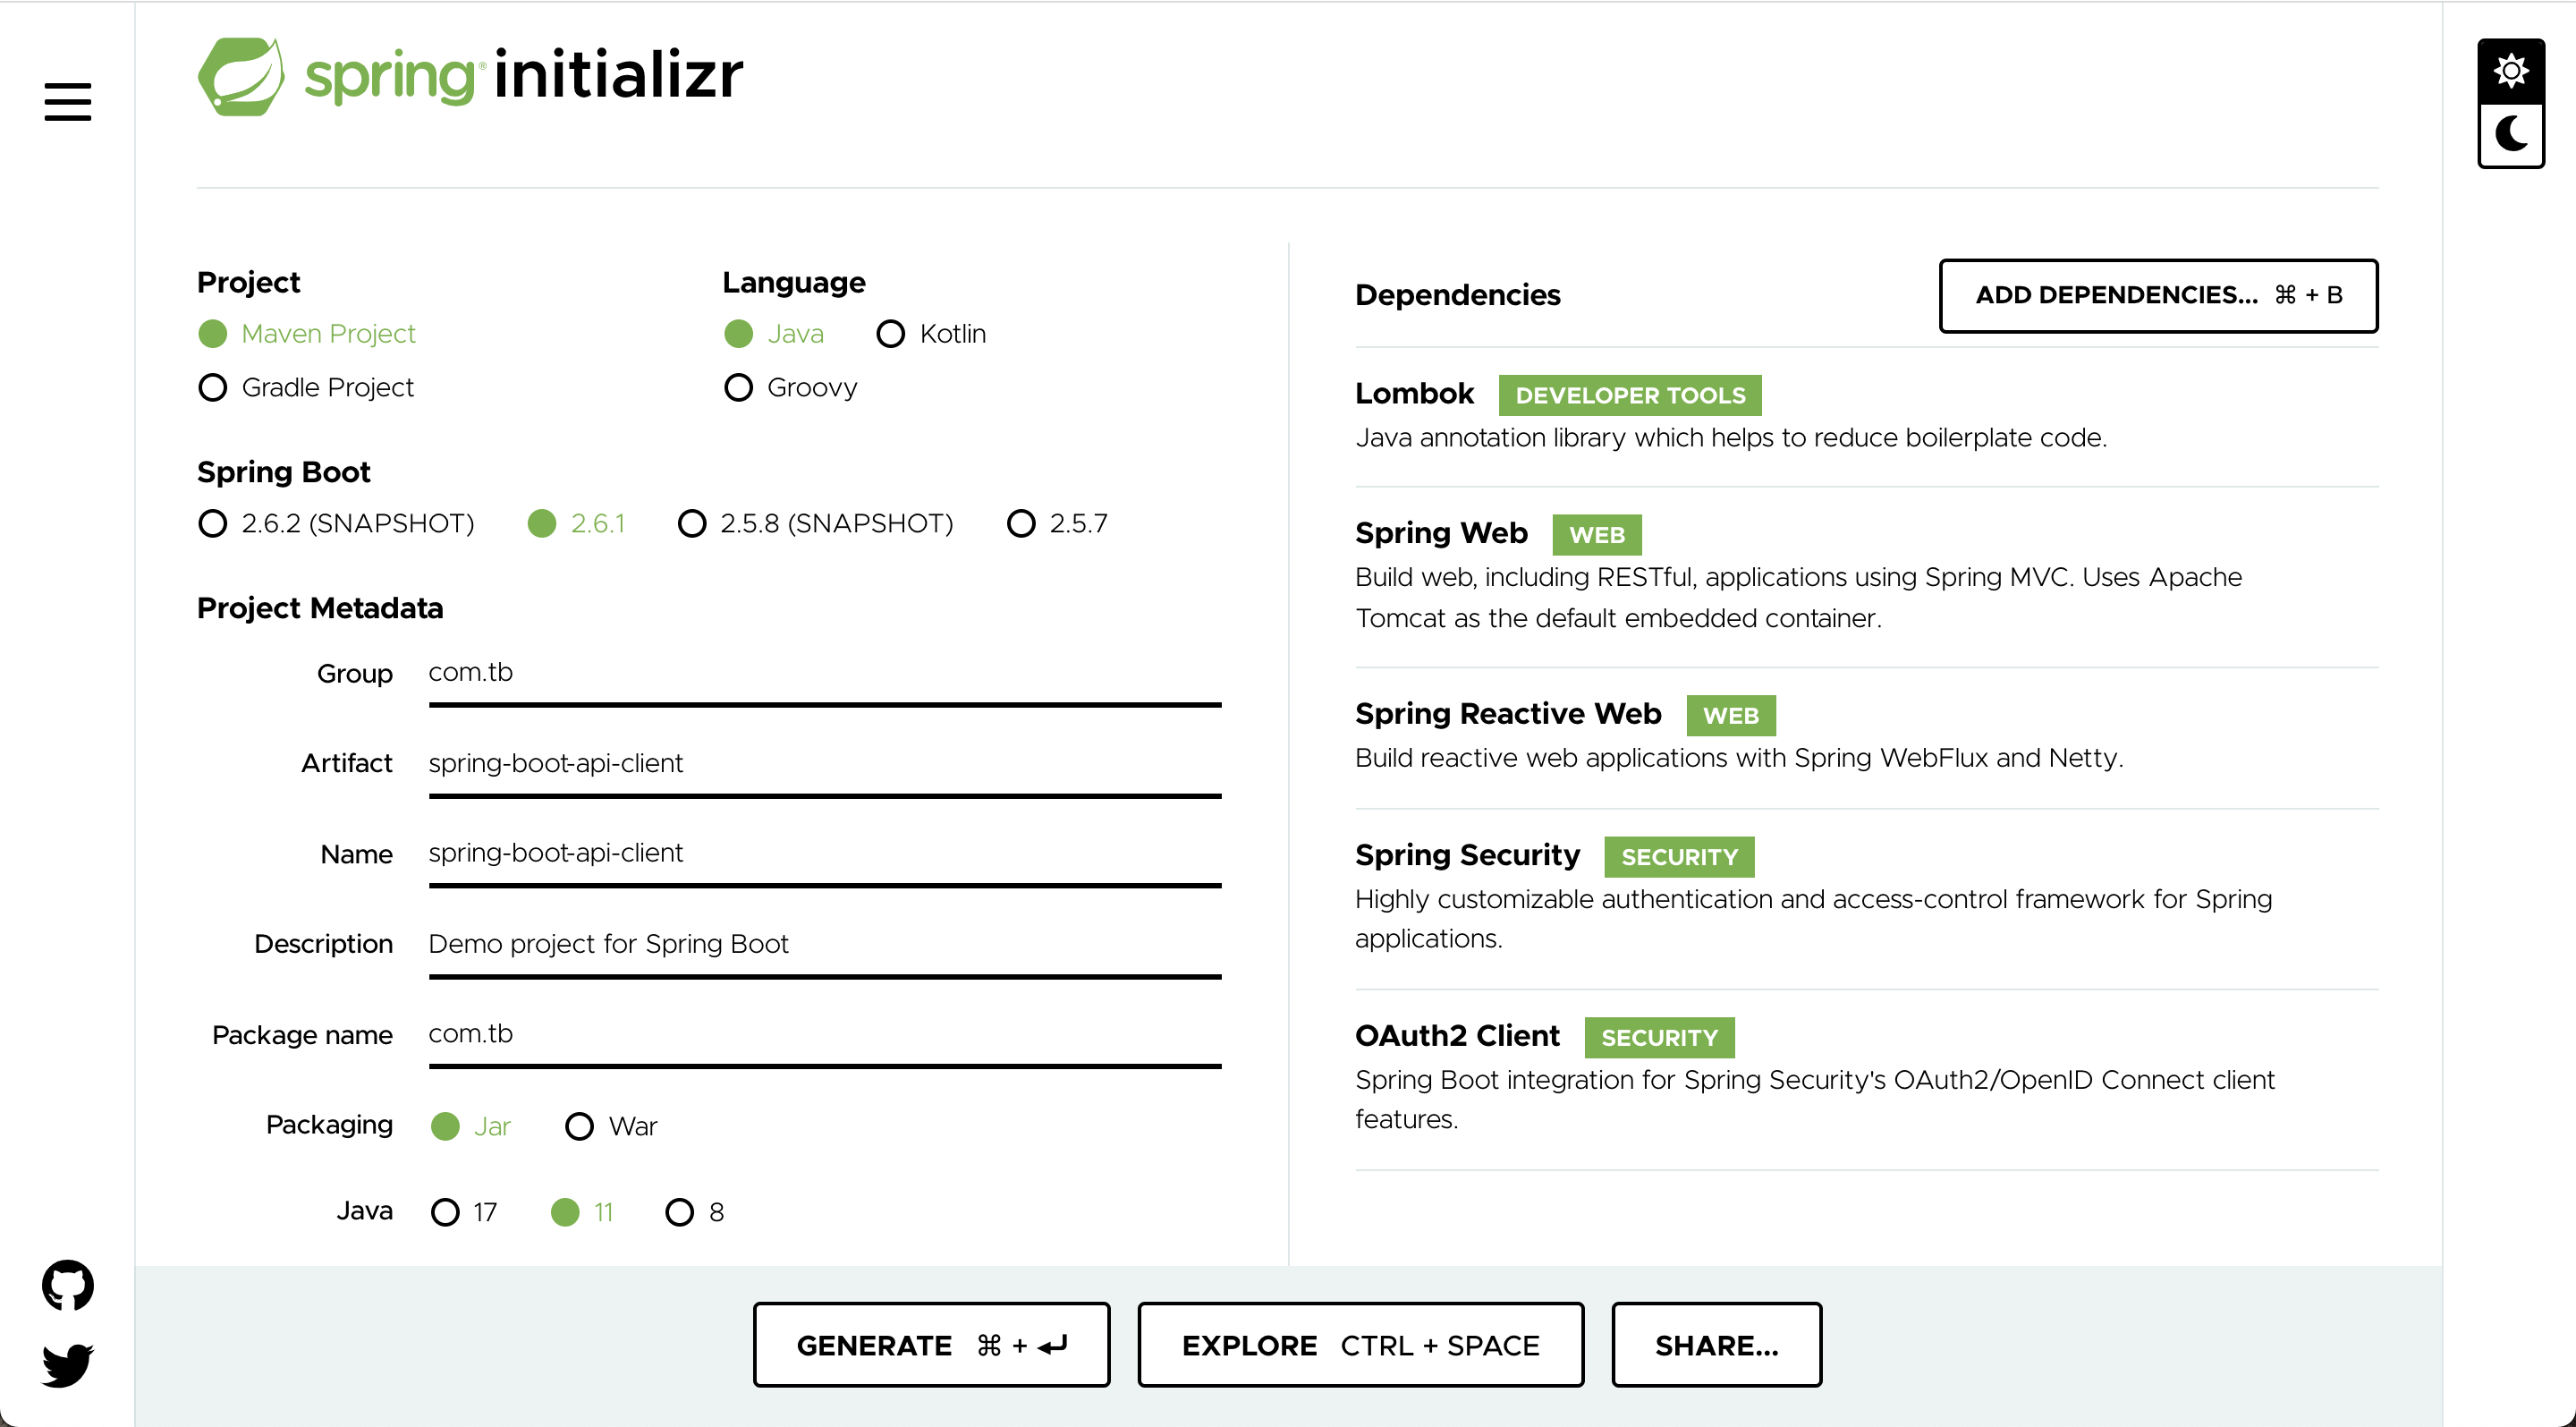
3) Client Server
This is another server; it will act as a client for "Resource Server" and will access "Product" APIs with the help of an "OAuth 2.0 token" obtained from "Authorization Server."
3.1) Dependencies
Lets create a project with Spring Initializr, make sure to add required dependencies as shown in the picture below:
 Dependencies
The final "pom.xml" should look something like this:
3.2) Model
We will retrieve a list of "Product" from "Resource Server", here is the model to de-serialize it:
3.3) Configuration
In the configuration below, we are configuring a "WebClient" to send requests to "Resource Server" and a ClientProvider to authorize client-credentials with "Authorization Server".
Next, we can also configure "@EnableWebSecurity" to manage the security of this "Client Server" itself, let's use "HttpSecurity" to secure all the URLs except "/products-view/**".
3.4) Controller
We have configured a "@GetMapping" for "/products-view", we will use this to retrieve the list of "Product" from "Resource Server" and show the same as a JSON in the browser.
3.5) Properties file
Let's add "client" credentials, "debug" related properties, "server port" and "issuer-uri" to "application.yml".
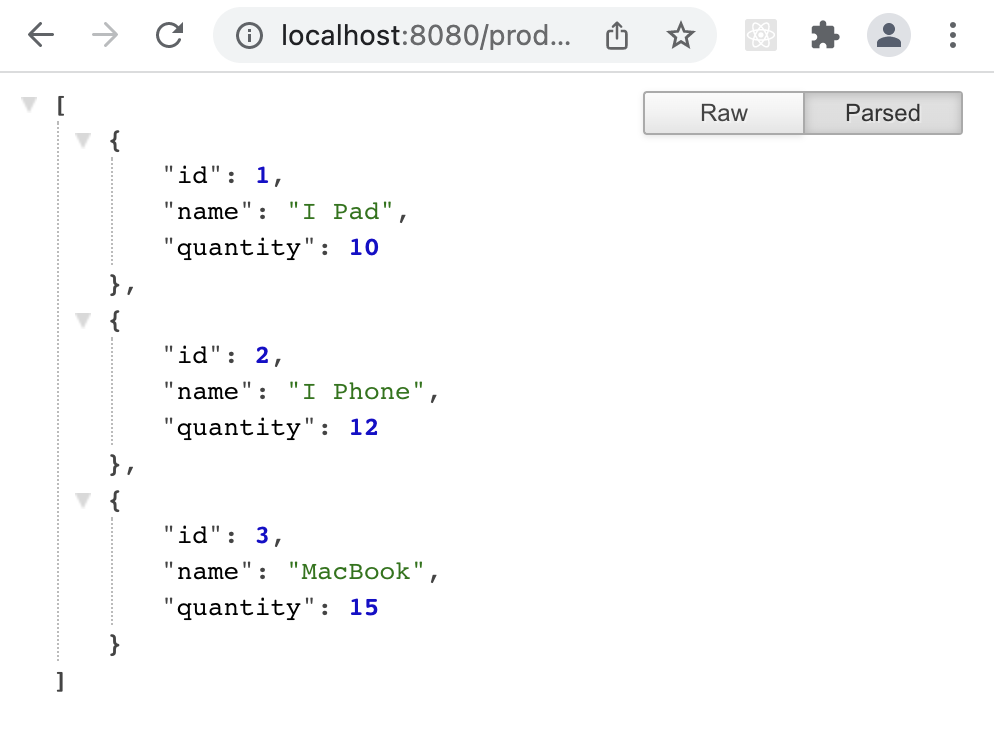
These client credentials will be used to get a "OAuth 2.0 tokens" from "Authorization Server".4) Testing
We can now test our Server-to-Server Communication flow, lets run "authorization-server", "resource-server" and "client-server" in order and navigate to http://localhost:8080/products-view.
Comments
Post a Comment